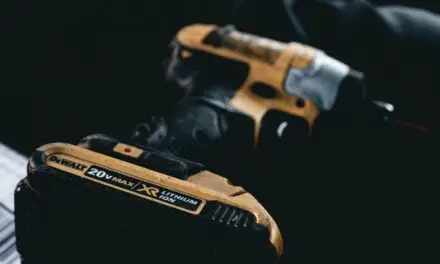
If you own an 18V DeWalt battery, then you might be wondering if reconditioning it is an option so you can avoid the cost of a replacement. Battery reconditioning is the process of restoring a battery to its original capacity by cycling the battery through a series of discharge and recharge cycles.
You can recondition an 18V DeWalt battery containing nickel-cadmium cells with a method known as equalization charging. This entails overcharging the battery past its full charging cycle to remove built-up sulfate and balance each cell’s voltage. Alternatively, you can revive or rebuild the battery.
In this article, we will provide a step-by-step guide on how to recondition your 18V DeWalt battery using equalization charging so you can restore it to its former glory and save the money you would’ve spent on a replacement.
How to Recondition an 18V DeWalt Battery
There comes a time in nearly every DeWalt battery’s life when it no longer holds a charge for nearly the same duration as it did when it was brand new.
Before you drop $30-$70 on a replacement battery, we recommend reconditioning the one you have by following the steps listed below.
Remember that this process will only work for 18V DeWalt batteries that contain nickel-cadmium (NiCad) cells.
If your battery contains lithium-ion (Li-ion) cells, you’ll need to take it to a specialist at a battery repair store to recondition it.
Here’s how to recondition an 18V DeWalt battery:
- Charge your 18V DeWalt battery until it appears fully charged
- Insert the 18V DeWalt battery into your power drill
- Secure the drill in a vice to ensure it won’t fall over or damage its surroundings during this process
- Turn the power drill on and tape or tie the engagement button, so it runs freely
- Allow the power drill to operate until the battery is discharged
- Turn the power drill off once it’s stopped operating and leave it to cool (30-60 minutes)
- Turn the power drill back on and allow it to run again until it stops
- Once you can no longer turn the power drill back on, the battery is fully discharged, and you can remove the power drill from the vice and the battery from the power drill
- Allow the battery to cool again, and then place it in the charger until it is fully charged
What happens during this process is that the crystals in the 15 NiCad cells will break down throughout the discharging process. This reduces their size, consequentially allowing them to hold more power.
Once the battery is fully discharged, you should notice that it takes significantly longer to recharge fully than before and has improved performance for a longer duration when reinserted to your power drill.
How to Revive an 18V DeWalt Battery
A common grievance people have with reconditioning their 18V DeWalt battery using the equalization charging method is that it requires you to be able to fully charge the battery before discharging it.
So, if your DeWalt battery is constantly being rejected by the charger as a “bad battery,” you can’t recondition it this way.
Other people aren’t a huge fan of allowing their drill to run freely for minutes or even hours on end out of concern that this will overheat and excessively wear down internal components.
These are all valid points that lead us to this alternative of reviving your 18V DeWalt battery. This process is essentially equivalent to jumpstarting a car battery.
All you need is one (or more) DeWalt batteries in good condition and a pair of jumper leads.
Connect the positive contact of the good battery to the positive contact of the bad battery and repeat with the negative contacts.
Some people will insert a flathead screwdriver into the contact points and connect via the metal portion and leave them connected for 20-30 seconds.
Afterward, you should find that your bad battery is charging once again.
How to Repair or Rebuild an 18V DeWalt Battery
Reviving your 18V DeWalt battery is a fantastic quick fix, but it is often seen as a band-aid to a larger issue. Oftentimes, it doesn’t take long before this battery starts to struggle holding a charge once again.
This is because you aren’t solving the underlying issue that’s occurring with the battery’s interior cells. What typically happens in power tool batteries is that one or more of its 15 cells (each producing 1.2 volts) is damaged or dead, which negatively impacts all other connected cells.
Thankfully, instead of replacing the battery altogether, you can fix this issue by removing the dead/damaged cell(s), or, if you’re willing, you can completely rebuild the battery.
To replace one or more cells, start by unscrewing and removing the battery’s exterior case so you can access the internal cells.
You’ll then check the voltage of each cell using a multimeter/voltmeter. Ideally, they should read around 1.2, which means any battery reading significantly below that (ex., 0.2) needs to be removed.
Using a pair of pliers, gently remove the solder tabs on your damaged cells, hot glue the new cells in place, and then solder the tabs back onto the new cells to restore the circuit.
This should resolve the issue and restore your battery.
If you find that multiple cells (maybe around half) are dead or damaged and would rather rebuild them completely, you can do so by using the method listed above on a larger scale.
We also recommend watching this tutorial for a more in-depth guide.
Final Thoughts
DeWalt batteries are rarely cheap to purchase and replace, which is why it is extremely cost-effective to try to recondition, revive, repair, or even rebuild them yourself before heading to the hardware store.
The guides listed here should help you do just that, and if you find that your 18V DeWalt battery still isn’t working properly afterward, at least you’ll know you tried everything before purchasing a replacement.
